
Pathways do more than connect point A to point B. They shape how someone moves through a yard, protect grass from wear, and add structure to the landscape. Whether the goal is a formal flagstone corridor or a simple gravel trail, the right pathway can turn a muddy shortcut into an intentional design element. With material costs fluctuating and installation methods ranging from weekend DIY to contractor work, understanding the options, and their trade-offs, helps homeowners make informed choices that fit their budget, skill level, and yard conditions.
Table of Contents
ToggleKey Takeaways
- Backyard pathway ideas improve functionality by protecting grass from wear, enhancing accessibility, and boosting property resale value through intentional landscaping design.
- Natural stone pathways like flagstone offer timeless elegance and durability ($15–$30 per sq ft), though they require careful installation and handling of irregular pieces.
- Gravel and pebble paths provide budget-friendly appeal at $30–$50 per cubic yard, but require solid base preparation with landscape fabric and edging to prevent weed growth and material migration.
- Brick and concrete pavers deliver classic charm with geometric patterns and multiple design options, costing $3–$10 per sq ft in materials plus $5–$15 per sq ft for professional installation.
- Creative DIY pathways using mulch, stepping stones with ground cover, or recycled materials minimize costs while adding cottage-garden charm to low-traffic areas.
- Combining materials—such as gravel paths with stepping stone intervals or mulch trails edged in salvaged brick—creates visual interest while staying budget-conscious for homeowners.
Why Adding a Pathway Enhances Your Backyard
A well-placed pathway protects high-traffic zones from erosion and compaction. Lawns subjected to repeated foot traffic develop bare patches and soil compaction, which strangles root growth. Pathways redirect that wear onto durable surfaces.
They also improve accessibility. A level, stable walking surface reduces trip hazards, especially in areas with uneven terrain or wet conditions. This matters for households with kids, elderly family members, or anyone navigating the yard after dark.
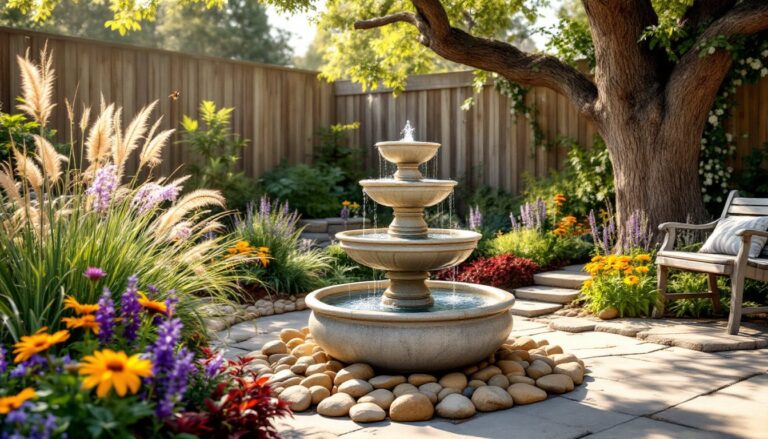
From a design standpoint, pathways create visual flow. They guide the eye, define garden beds, and break up large expanses of lawn or mulch. When integrated into larger outdoor renovations, pathways act as anchors that tie together separate zones, fire pit areas, vegetable gardens, sheds, or seating nooks.
Finally, pathways boost resale value. Buyers notice intentional landscaping. A thoughtfully laid path signals that the property has been maintained and planned, not left to chance.
Natural Stone Pathways for Timeless Elegance
Flagstone, bluestone, and slate offer irregular shapes and rich color variation. Each piece is unique, which gives natural stone paths an organic, high-end look. Flagstone typically ranges from 1 to 2 inches thick and comes in random sizes or pre-cut rectangles.
Installation methods vary. Dry-laid flagstone sits on a compacted gravel base with sand or decomposed granite swept into the joints. This allows for drainage and slight movement, which works well in freeze-thaw climates. Mortared installations on a concrete slab provide a more permanent, formal finish but require professional skills and don’t flex with ground movement.
Cost and labor are the main trade-offs. Natural stone runs $15–$30 per square foot for materials alone, depending on type and region. Cutting and fitting irregular pieces takes time. A circular saw with a diamond blade handles straight cuts: a wet saw or angle grinder works for curves. Beginners should plan for a slower pace, this isn’t a one-afternoon project.
Durability is excellent. Stone handles foot traffic, freeze-thaw cycles, and UV exposure without degrading. Moss and algae can develop in shaded, damp areas: a stiff brush and diluted vinegar solution usually does the trick. For pathways that complement contemporary design trends, natural stone pairs well with minimalist plantings and metal edging.
Gravel and Pebble Paths for Budget-Friendly Appeal
Crushed gravel (angular stones) and pea gravel (rounded pebbles) offer fast installation at a fraction of the cost of stone or pavers. Expect to pay $30–$50 per cubic yard, with a typical 3-foot-wide path requiring about 0.5 cubic yards per 10 linear feet at a 2-inch depth.
Base preparation is critical. Excavate 4–6 inches, lay down landscape fabric to suppress weeds, then add a 3–4 inch layer of compacted crushed stone (¾-inch minus works well). Top with 2 inches of your finish gravel. Skipping the base invites rutting and weed growth.
Edging keeps gravel contained. Options include steel or aluminum landscape edging (clean, modern), pressure-treated lumber (rustic, budget-friendly), or brick set on edge. Without edging, gravel migrates into adjacent beds and lawns.
Maintenance involves periodic raking to redistribute gravel and top-dressing every few years as material compacts or washes away. Gravel pathways drain well, making them ideal for areas with poor drainage or heavy rain. They’re also forgiving for DIYers, no cutting, no leveling individual units, and mistakes are easy to correct.
Drawbacks include mobility issues (wheelchairs and strollers struggle on loose gravel) and snow removal challenges in cold climates. For a polished look inspired by low-impact pathway designs, consider using uniform pebble sizes and crisp edging lines.
Brick and Paver Designs for Classic Charm
Clay brick and concrete pavers deliver geometric precision and a wide range of patterns, herringbone, basketweave, running bond, or circular motifs. Standard brick pavers measure 4 × 8 inches (actual dimensions closer to 3⅝ × 7⅝ inches): concrete pavers come in modular sizes from 6 × 6 inches to 12 × 24 inches.
Base construction mirrors flagstone dry-lay: excavate to depth (typically 7–9 inches total), add 4–6 inches of compacted crushed stone base, then 1 inch of leveling sand. Pavers sit on the sand, joints are filled with polymeric sand (which hardens when wetted), and the surface is compacted with a plate compactor. Renting a plate compactor costs $50–$80 per day and is essential for a stable, long-lasting path.
Cutting pavers requires a masonry blade on a circular saw or a dedicated brick/paver splitter (rentable). Wear safety goggles and a dust mask, cutting generates fine silica dust. For curves, mark the cut line with chalk and work slowly.
Permeable pavers (with wider joints or grid designs) allow water infiltration, reducing runoff and meeting some stormwater ordinances. They cost 10–20% more but may be required in certain jurisdictions or preferred for environmental reasons.
Longevity and aesthetics make pavers a strong mid-range investment. Expect materials to cost $3–$10 per square foot. Labor adds $5–$15 per square foot if hiring out. For homeowners tackling beginner-level outdoor upgrades, a small paver pathway (under 100 square feet) is a manageable first project with the right tools and prep.
Creative DIY Pathway Ideas on a Budget
Mulch and Wood Chip Trails
Shredded hardwood mulch or wood chips create soft, informal paths ideal for garden areas and wooded sections. Material costs run $25–$40 per cubic yard: many municipalities offer free wood chips from tree trimming operations.
Excavate 2–3 inches, lay landscape fabric (4-ounce minimum weight), and spread 3–4 inches of mulch. Edging is optional but recommended, even a shallow trench along the path edge helps contain material. Mulch compacts and decomposes over time, so plan to top-dress annually.
Pros: Low cost, easy on joints, natural aesthetic. Cons: Decomposes, needs replenishment, can harbor pests if in direct contact with structures. Not suitable for high-traffic or formal areas. Avoid cedar or cypress mulch near vegetable gardens if using organic methods, some contain allelopathic compounds.
For inspiration on integrating mulch paths into broader landscape projects, many design resources feature eclectic pathway layouts.
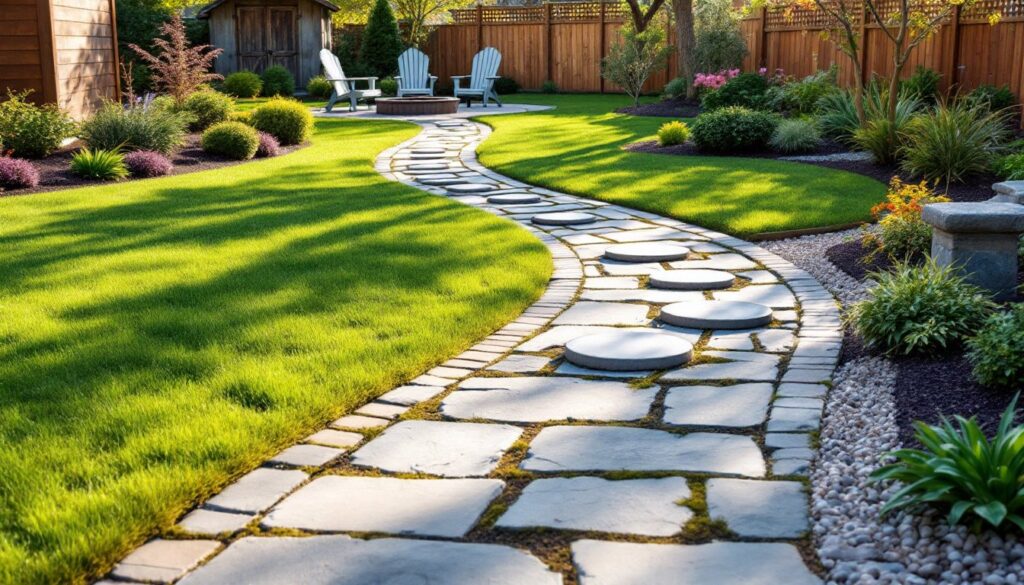
Stepping Stone Layouts with Ground Cover
Flagstone, concrete rounds, or salvaged pavers spaced 18–24 inches apart (one comfortable stride) with ground cover plants filling the gaps create a cottage-garden feel. Common ground covers include creeping thyme (Thymus serpyllum), Irish moss (Sagina subulata), or blue star creeper (Isotoma fluviatilis).
Installation: Set stones on a 2-inch sand base for stability. Space them in a natural, meandering line or geometric grid. Plant ground cover plugs in the gaps, water regularly until established, and mulch lightly to suppress weeds during establishment.
Maintenance is higher than solid pathways, ground covers need weeding, occasional trimming, and may thin out in heavy foot traffic. They work best for light-use paths (to a garden shed, between beds) rather than main circulation routes. Creeping thyme tolerates moderate foot traffic and releases fragrance when stepped on: it’s also drought-tolerant once established.
Cost is minimal if using reclaimed materials. New stepping stones run $3–$8 each: ground cover plugs cost $2–$5 per plant. For a 20-foot path with 10 stones and 30 plugs, expect $90–$230 in materials. This approach fits well into budget-conscious transformations that prioritize charm over formality.
Another low-cost option involves recycled materials, broken concrete (urbanite), reclaimed brick, or salvaged pavers. Check local classifieds, demolition sites, or landscape supply yards. Urbanite, when laid flat and gaps filled with gravel or moss, delivers an industrial-rustic look. Always wear work gloves and safety goggles when handling broken concrete: edges can be sharp.
For DIYers seeking variety, combining materials works well. A gravel path with stepping stones at intervals, or a mulch trail edged with salvaged brick, adds visual interest without doubling the budget. Resources like The Spruce often feature mix-and-match pathway galleries that spark ideas.