
A sloped backyard isn’t a landscaping problem, it’s a design opportunity hiding in plain sight. While flat yards require creativity to add dimension, a hillside naturally offers elevation changes, layered planting zones, and built-in drainage. The challenge is working with the slope instead of fighting it, and doing so without spending thousands on professional grading or heavy machinery. With smart material choices, DIY-friendly techniques, and a willingness to get hands dirty, homeowners can turn an awkward incline into a functional outdoor retreat that rivals any flat-yard design.
Table of Contents
ToggleKey Takeaways
- Sloped backyard ideas leverage natural elevation changes for drainage, microclimates, and visual depth without requiring expensive regrading or permits.
- Terraced garden beds create flat, stair-stepped planting zones held by timber or stone borders, transforming steep slopes into functional growing areas.
- Budget-friendly retaining walls 2–3 feet high using pressure-treated timbers or dry-stacked stone can carve out level patios and entertaining spaces without heavy equipment.
- Switchback pathways and timber steps reduce the effective grade, improve accessibility, and connect slope zones into a cohesive outdoor layout.
- Ground cover plants and native perennials stabilize slopes long-term while requiring minimal maintenance and water once established.
- Sloped backyard transformations start small—with one terrace, pathway, or planting zone—and build outward, delivering professional-quality results at a fraction of professional landscaping costs.
Why Sloped Backyards Are a Hidden Opportunity
Most homeowners see a slope and think erosion, runoff, and unusable space. But hillsides deliver advantages that flat lots can’t match. Natural drainage keeps water moving away from the house foundation, a major plus in wet climates. Elevation changes create microclimates: the top of the slope gets more sun, the base stays cooler and shadier. That variety lets gardeners grow a wider range of plants in one yard.
Slopes also add visual interest without additional hardscaping. A tiered garden bed or stone path winding uphill creates depth and movement that a flat lawn can’t replicate. The key is working with the existing grade instead of hiring an excavator to flatten it. Regrading requires permits in many jurisdictions, especially if the slope exceeds 3:1 (three feet horizontal for every one foot vertical). Structural changes like that often trigger stormwater management reviews and engineered plans.
Budget-friendly backyard transformations lean into what the slope already offers. Terracing, pathways, and erosion control don’t require permits in most areas, and they’re all within reach of a DIYer with basic carpentry or masonry skills.
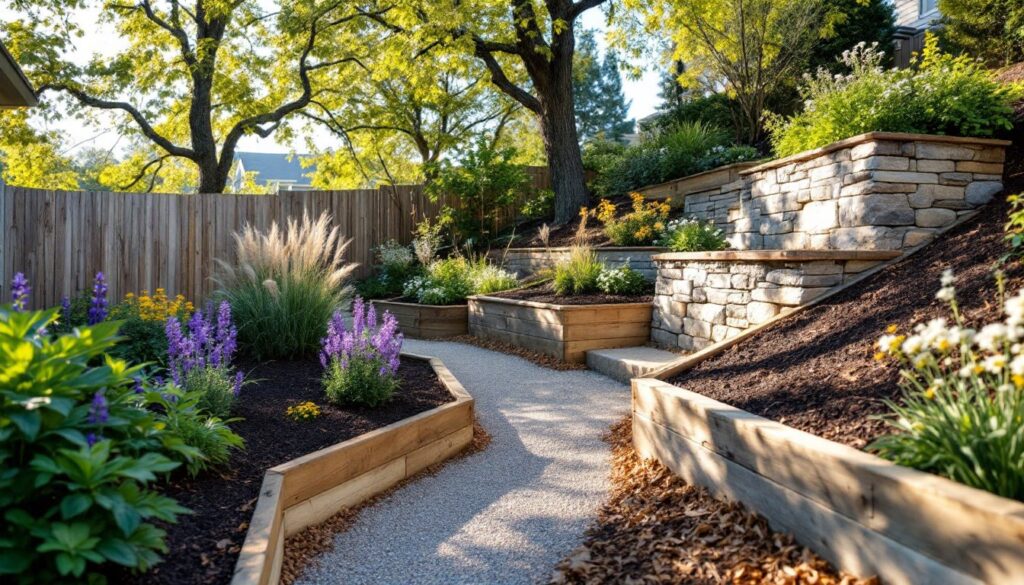
Create Natural Terraced Garden Beds
Terracing turns a sloped yard into stair-stepped planting zones. Each level is a flat bed held in place by a low wall or berm, creating usable planting space and slowing water runoff. This technique has been used for centuries, think rice paddies in Asia or vineyards in Europe, and it scales down perfectly for a suburban hillside.
Start by mapping out the tiers. For most DIY projects, aim for 2 to 3 feet of vertical drop per terrace. Shallow slopes (less than 15 degrees) can handle wider, gentler steps: steeper grades need tighter spacing. Use stakes and string to mark the outline of each level, then dig into the slope to create a flat shelf. The soil removed from the uphill side gets moved to the downhill edge to build up the terrace front.
Edge each tier with pressure-treated 4×4 or 6×6 timbers, stacked landscape blocks, or dry-stacked stone. For timbers, drill pilot holes and drive ½-inch rebar stakes through the wood into the soil to anchor them. This isn’t a retaining wall, it’s a low border to hold mulch and prevent soil creep. Slope solutions often rely on these simple gravity-based structures rather than engineered walls.
Fill each terrace with a mix of native topsoil and compost. Avoid heavy clay, which compacts and sheds water. Plant perennials, shrubs, or vegetables suited to the sun exposure at that level. Mulch heavily, 3 to 4 inches of shredded bark or wood chips, to retain moisture and prevent erosion between plants.
Build Simple Timber or Stone Retaining Walls
If the slope is steep or the goal is to carve out a level patio or play area, a retaining wall becomes necessary. Code and engineering come into play here: walls over 4 feet tall typically require a permit and engineered plans. For budget-conscious DIYers, the sweet spot is walls 2 to 3 feet high, which are manageable without heavy equipment or structural calculations.
Timber walls are the most approachable option. Use pressure-treated 6×6 or 8×8 landscape timbers rated for ground contact. Dig a trench at the base of the slope, level it, and compact 4 inches of crushed gravel for drainage. Lay the first course of timbers in the trench, checking level in both directions. Drill holes and drive ½-inch rebar or 10-inch timber spikes through each timber into the one below, staggering joints like brickwork. Backfill behind the wall with gravel to allow water to drain, never trap water behind a retaining wall.
Dry-stacked stone walls cost more upfront but last decades. Flat fieldstone or quarried wall stone works best. The same drainage principles apply: gravel base, batter (slight backward lean) for stability, and gravel backfill. Each stone should span at least two stones below it. This is slower, heavier work than timber, but the material cost can be competitive if stone is locally available.
For walls under 2 feet, interlocking concrete blocks are another option. They stack without mortar and often include a built-in setback for stability. Expect to pay $3 to $6 per block depending on style. Many outdoor design projects use these for raised beds and low retaining walls.
Add Pathways and Steps for Accessibility
A sloped yard is only useful if people can move through it safely. Paths and steps turn a hillside into a series of connected zones rather than a no-go area. The goal is to reduce the effective grade by zigzagging or stepping up gradually.
Switchback paths are the easiest budget solution. Lay out a path that cuts diagonally across the slope, reverses direction at a landing, then climbs the next section. This reduces the grade to a comfortable walk. Edge the path with pressure-treated 2×4 or 2×6 boards staked into the ground, then fill with crushed gravel, decomposed granite, or wood chips. Keep the path at least 3 feet wide for comfortable two-way traffic.
Steps are necessary when the grade exceeds 10 to 15 degrees. Timber steps are the budget-friendly standard. Cut pressure-treated 6×6 timbers to width (3 to 4 feet is typical), dig them into the slope so they’re level front-to-back, and backfill with gravel. Each step should have a 6- to 8-inch rise (vertical height) and at least a 10- to 12-inch run (tread depth). Shallower, wider steps are easier on the knees and safer in wet weather.
Stone or paver steps look more polished but take longer. Set each stone in a gravel base, compact it, and check for level and consistent riser height. Inconsistent step heights are a tripping hazard, measure twice. Outdoor lighting (solar stakes or low-voltage path lights) improves safety and usability after dark.
Install a Budget-Friendly Slope Deck or Patio
Carving a level entertaining space out of a slope is one of the highest-value upgrades. A deck or patio creates usable square footage and serves as a visual anchor for the whole yard.
Ground-level patios work best at the base of a slope where the grade is gentler. Excavate into the slope to create a flat pad, then install a gravel base and paver or flagstone surface. Compact the gravel in 2-inch lifts with a plate compactor (rent one for around $60 per day). Lay pavers on 1 inch of leveling sand, sweeping polymeric sand into the joints to lock them in place. Total material cost for a 10×12-foot patio runs $400 to $800 depending on paver choice.
Freestanding decks are ideal for mid-slope installations where the back of the deck sits near grade and the front is elevated. Use pressure-treated posts set in concrete footings (check frost depth requirements, typically 36 inches in cold climates). Frame with 2×8 or 2×10 joists on 16-inch centers, and deck with 5/4×6 pressure-treated or composite boards. Composite costs more upfront but requires no staining or sealing.
Decks over 30 inches high require guardrails per IRC code. Any deck attached to the house requires a ledger board properly flashed and bolted to the rim joist, this connection often requires a permit and inspection. Freestanding decks under 200 square feet may not require permits in some jurisdictions, but always check locally. Homeowners tackling major outdoor upgrades should confirm code requirements before framing begins.
Use Ground Cover Plants to Prevent Erosion
Hardscaping alone won’t stabilize a slope. Plants are the long-term erosion solution, and ground covers are the most cost-effective option. Their spreading roots hold soil in place, and their foliage slows water runoff.
Native ground covers are the best bet for low maintenance and drought tolerance. In many regions, options include creeping juniper, wild strawberry, periwinkle (vinca minor), or creeping phlox. These spread quickly, require little water once established, and thrive in poor soil. Plant on 12- to 18-inch centers for faster coverage, or space wider to save money and let them fill in over two seasons.
For steeper slopes, consider erosion control matting, jute or coconut fiber mesh rolled out and staked into the slope. Plant through the mesh: it holds soil while roots establish, then biodegrades. Expect to pay $0.50 to $1.50 per square foot for the matting. This is standard practice on commercial sites and works just as well in residential settings.
Ornamental grasses add texture and year-round interest. Switchgrass, little bluestem, and fountain grass have deep roots and tolerate lean soil. Plant them in drifts along the slope, mixing heights for visual variety. Water new plantings weekly for the first season, then let them go dormant in dry periods. Mulch around each plant with 2 to 3 inches of shredded bark to conserve moisture and suppress weeds.
Avoid invasive species like English ivy or Japanese honeysuckle, even though they’re cheap and fast-growing. They’ll take over the yard, climb trees, and become a maintenance headache. Many landscaping resources provide regional invasive species lists, check before buying.
Conclusion
A sloped backyard doesn’t have to be a liability. With terracing, retaining walls, pathways, and smart planting, homeowners can turn a hillside into a layered, functional outdoor space without hiring a landscape architect. The work is physical, the planning takes time, but the payoff is a yard that stands out and solves problems flat lots can’t. Start with one zone, a set of steps, a terrace, or a ground cover planting, and build from there.