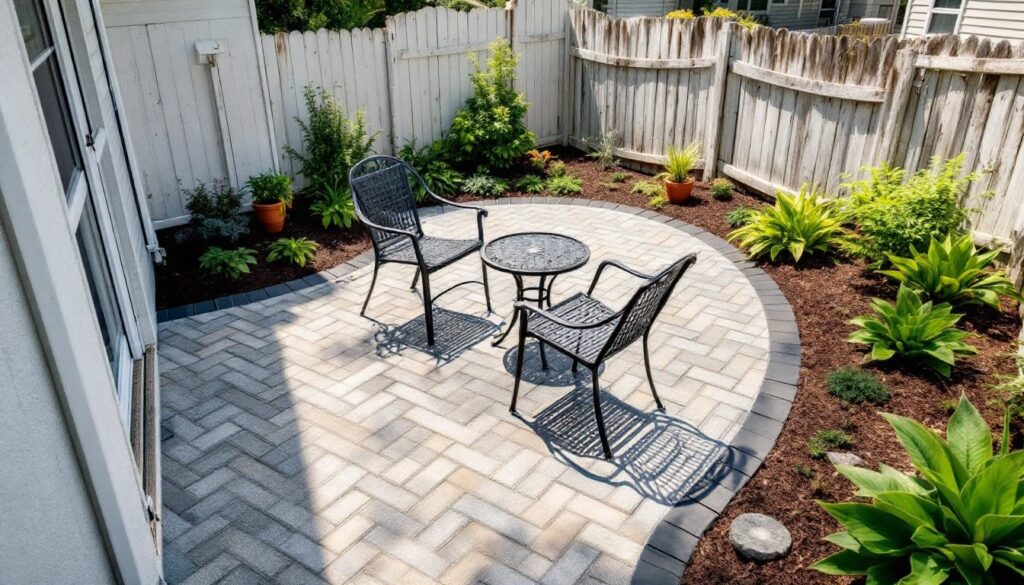

Small backyards often get overlooked, but they’re perfect candidates for paver installations. Unlike large-scale hardscaping projects, a compact patio or walkway requires less material, less labor, and delivers immediate visual impact. Whether someone’s working with a 10×12 patio footprint or a narrow side yard, pavers offer durability, design flexibility, and a DIY-friendly installation process. This guide walks through pattern choices, layout ideas, material options, and installation tips tailored specifically for tight spaces.
Table of Contents
ToggleKey Takeaways
- Small backyard pavers require less material and labor than large projects while delivering immediate visual impact with designs like herringbone, basketweave, and running bond patterns.
- Pavers excel in small spaces because they need no curing time, individual units weigh 10–15 pounds, and cracked units can be easily replaced without tearing out entire sections like concrete.
- Herringbone patterns draw the eye outward and make tight spaces feel wider, while running bond is the easiest for beginners with minimal cutting and faster installation.
- Concrete pavers are the most budget-friendly option at $1–$3 per square foot, but natural stone, clay brick, and porcelain offer premium aesthetics for different design goals and climates.
- Proper excavation depth (7–9 inches), slope establishment (¼ inch per foot for drainage), and edge restraint installation are critical to prevent settling, pooling water, and lateral paver creep.
- Most small backyard paver projects under 150 square feet are DIY-manageable over a weekend with a plate compactor, wet-saw, and polymeric sand for joint locking.
Why Pavers Are Perfect for Small Backyards
Pavers excel in confined spaces for several practical reasons. They don’t require the curing time of poured concrete, so a weekend warrior can walk on the finished surface almost immediately. Individual units are manageable, most concrete pavers weigh 10–15 pounds, and brick pavers are lighter still, making them easier to transport and handle without a crew.
From a design perspective, pavers create visual texture that makes small areas feel intentional rather than cramped. A 100-square-foot patio in running bond or herringbone reads as a deliberate outdoor room, not leftover yard. Pavers also simplify future repairs: if a utility line needs access or a single unit cracks, just lift and replace the affected pieces. Concrete slabs require saw cutting and patching, which rarely matches the original pour.
Permitting varies by jurisdiction, but most non-structural, at-grade paver patios under 200 square feet don’t trigger permit requirements in residential zones. Always verify with the local building department, especially if the project involves excavation deeper than 12 inches or sits adjacent to property lines. Drainage matters, too, pavers are permeable when installed with polymeric sand joints, reducing runoff compared to solid concrete.
Best Paver Patterns to Maximize Your Small Space
Herringbone and Basketweave for Visual Interest
Herringbone is the workhorse pattern for small patios. The 45-degree or 90-degree zigzag locks pavers together mechanically, distributing weight and resisting shifting under foot traffic. Visually, the diagonal lines draw the eye outward, making a 10×10 space feel wider. It requires more cuts at borders, budget an extra 5–10% waste, but the structural stability is worth it for high-traffic zones near doorways.
Basketweave pairs two pavers horizontally, then two vertically, creating a woven checkerboard. It’s less labor-intensive than herringbone (fewer angle cuts) and works beautifully with 4×8-inch brick pavers or 6×9-inch concrete units. The grid effect adds rhythm without overwhelming small footprints. One caution: basketweave lacks herringbone’s interlock, so edge restraint, plastic paver edging spiked into the base, is non-negotiable. Skip it, and the perimeter pavers will creep outward within a season.
Running Bond for a Simple, Spacious Look
Running bond (also called offset or brick bond) staggers each row by half a paver length, mimicking classic brickwork. It’s the easiest pattern for beginners, minimal cutting, fast installation, and forgiving if measurements aren’t laser-precise. Running bond elongates narrow spaces: laying pavers lengthwise down a 4-foot-wide side yard makes it feel less like a hallway.
The main tradeoff is visual simplicity. Running bond doesn’t create the same dynamic interest as herringbone, so many homeowners in outdoor living upgrades use it for pathways and save patterned layouts for focal areas like seating zones. It’s also the most stable pattern when using rectangular pavers longer than 12 inches, which can rock in more complex layouts.
Creative Paver Layout Ideas for Compact Yards
Small yards demand layout creativity. A border-and-field design frames a central paver area with a contrasting color or smaller unit size, defining the space without adding square footage. For example, a 6×6-inch tumbled concrete field surrounded by a single course of 4×8 brick pavers creates a tailored edge that stops the eye, making the patio feel complete rather than cut short.
Diagonal installation is another space-expanding trick. Rotating the entire paver layout 45 degrees to the house or fence line breaks up the boxy geometry of small yards. The angled perspective reads as more spacious, though it increases cutting waste by 10–15% at borders. Use a wet-saw with a diamond blade for clean cuts on porcelain or dense concrete pavers: a masonry chisel and hammer works for softer brick but leaves rougher edges.
Stepping-stone paths with ground cover between pavers suit tight side yards or areas where a solid patio would overwhelm. Set 12×12 or 18×18-inch concrete pavers in decomposed granite or low-growing thyme, spacing them 4–6 inches apart. This semi-permeable approach handles drainage naturally and softens the hardscape. It’s not suitable for furniture placement, but perfect for foot traffic from a gate to a back door.
Curved borders add organic flow in awkward corners. Laying pavers in a gentle arc requires more cutting and planning, but the result feels less rigid than straight lines. Use flexible landscape edging to mark curves during base prep, ensuring consistent radius before setting pavers.
Choosing the Right Paver Materials for Your Budget and Style
Concrete pavers dominate the DIY market for good reason: they’re affordable ($1–$3 per square foot for basic gray, $4–$8 for textured or colored finishes), uniform in size, and available at every big-box store. Standard Holland pavers (roughly 4×8 inches nominal, actually 3⅝×7⅝) install quickly and suit any pattern. Concrete handles freeze-thaw cycles well in most climates, though cheap units under $1.50 per square foot may spall (flake) after a few winters. Look for products rated ASTM C936 for flexural strength.
Clay brick pavers bring timeless character and age gracefully, developing patina as efflorescence (natural salts) weathers out. Expect $3–$6 per square foot, more for reclaimed or tumbled finishes. Brick’s smaller footprint (typically 4×8 inches) means more joints, which translates to more leveling work but better flexibility on uneven terrain. They’re top-heavy in color, reds, oranges, tans, so verify the hue against the house before ordering a pallet. Brick works especially well in traditional garden settings where a historic or cottage aesthetic is the goal.
Natural stone pavers, flagstone, bluestone, travertine, start around $8 per square foot and climb quickly. They’re gorgeous and unique (no two pieces match), but irregular thickness demands patience during installation. Flagstone can vary ½ inch or more in height, requiring constant shimming with stone dust to achieve a level plane. For small projects where every square foot is visible, the extra effort pays off. Natural stone also stays cooler underfoot in summer heat compared to dark concrete.
Porcelain pavers are the newcomer: thin (¾ inch), lightweight, and available in wood-look or stone-look finishes. They’re pricey ($10–$20 per square foot), but they don’t absorb moisture, so freeze damage is essentially impossible. Installation requires a pedestal system or a thicker gravel base with geotextile fabric to prevent cracking. Porcelain suits modern aesthetics and shaded areas where moss or mildew would stain concrete.
DIY Installation Tips for Small Backyard Paver Projects
1. Excavate to Proper Depth
For a standard patio, dig down 7–9 inches below finished grade: 4 inches for ¾-inch crushed stone base, 1 inch for bedding sand, and 2–3 inches for paver thickness. Small projects tempt shortcuts, but skimping on base depth invites settling. Rent a plate compactor (around $60/day) rather than relying on hand tamping, compactors deliver 3,000–5,000 pounds of force, locking aggregate into a stable platform.
2. Establish Proper Slope
Patios and walkways need ¼ inch per foot slope away from structures for drainage. On a 10-foot-wide patio, that’s 2.5 inches of drop from house to far edge. Use a 4-foot level with a shim to check slope during base compaction and again during sand screeding. Pooling water will find every low spot, and once pavers are set, fixing grade means tearing out and restarting.
3. Screed Sand to Consistent Thickness
After compacting the stone base, spread 1 inch of coarse concrete sand (not play sand, which is too fine). Lay two 1-inch metal pipes as rails and drag a straight 2×4 across them to level the sand. Don’t compact sand before laying pavers, it should stay loose so pavers settle evenly when compacted afterward. Remove the pipes and fill voids with sand as you work.
4. Work From a Set Area, Not the Sand
Once pavers start going down, kneel or stand on the installed section, never on the screeded sand. Footprints create low spots that telegraph through as uneven pavers. Lay pavers snug together, polymeric sand will fill joints later. For herringbone or basketweave, start from a 90-degree corner and work outward: running bond can start along any straight edge.
5. Compact and Lock Joints
After all pavers are placed and cut, run the plate compactor over the surface to embed them into the sand bed. Wear hearing protection, compactors hit 95+ decibels. Sweep polymeric sand (sand mixed with binding agents) into joints, mist lightly with water, and let cure per manufacturer directions (usually 24 hours). Polymeric sand resists washout and inhibits weeds far better than plain sand. Don’t skip the misting: dry polymeric sand won’t activate.
6. Install Edge Restraint
Spike plastic paver edging into the base around the perimeter, securing it every 12 inches with 10-inch landscape spikes. Edge restraint prevents lateral creep, especially on slopes or when patterns lack mechanical interlock. It’s invisible once soil or mulch is backfilled, and it’s the difference between a patio that stays put for a decade versus one that needs re-leveling in three years.
Safety Note: Wet-cutting pavers with a diamond blade generates silica dust. Use a wet-saw with water feed to suppress dust, or wear an N95 respirator rated for silica if dry-cutting. Eye protection is mandatory, chips fly.
Most small paver projects (under 150 square feet) are manageable solo over a long weekend, though having a second person for base compaction and moving paver pallets saves the back. Homeowners tackling complete outdoor transformations often start with a paver patio as the anchor feature, then layer in plantings and lighting. The planning phase for such projects should include accurate measurements and material calculations, order 5% extra pavers to account for cuts and future repairs.