A well-planned grill setup turns an underutilized backyard into a functional outdoor kitchen where friends and family gather year-round. Whether the goal is a permanent built-in station or a flexible portable arrangement, the right configuration balances cooking performance with available space and budget. From DIY cinder block islands to premium stone surrounds, homeowners have more options than ever to create a cooking zone that fits their yard layout and entertaining style. The following ideas cover built-in stations, portable setups, budget-friendly DIY projects, and essential shelter solutions, all with practical details on materials, layout, and execution.
Key Takeaways
- Built-in grill stations require a solid 4-inch concrete foundation and can integrate gas lines and electrical outlets for a true outdoor kitchen, though licensed professionals should handle utilities and permits.
- Portable grill setups offer flexibility for renters and budget-conscious homeowners, with propane cart grills and charcoal kettles being the most popular options for residential use.
- DIY grill islands using cinder blocks and concrete can be built for $400–$800 in materials, while premium stone or brick surrounds cost significantly more but create durable outdoor features that last decades.
- Proper grill placement requires at least 10 feet of clearance from your house and overhead structures, and backyard grill ideas should include gravel pads or mats to prevent staining and fire hazards.
- Shade structures like pergolas, canopies, or pavilions extend grill usability and protect equipment, but proper ventilation is essential to prevent dangerous carbon monoxide buildup in enclosed spaces.
- Material choices—from stucco and tile finishes to granite countertops—should balance budget, climate durability, and aesthetic goals to match your yard’s existing hardscaping.
Built-In Grilling Stations for Permanent Outdoor Kitchens
Built-in grill stations anchor a permanent outdoor cooking zone, integrating the grill into a custom countertop with storage, utilities, and prep space. These installations require solid foundations, typically a 4-inch concrete slab poured over compacted gravel to prevent settling and cracking. Expect to dig down 6–8 inches for proper base depth, especially in regions with freeze-thaw cycles.
Most built-in setups use a drop-in grill head (the firebox without cart or side shelves) installed into a masonry or steel-frame surround. Popular materials include concrete block with stucco or tile finish, natural stone veneer, or modular outdoor kitchen kits made from weatherproof polymer or powder-coated steel. Stone and masonry provide durability but add weight, confirm the slab can support 200+ pounds per linear foot for dense materials like full-thickness granite or stacked stone.
Gas line installation is a common upgrade for built-ins. Running a dedicated line from the home’s gas meter to the grill location requires a licensed plumber in most jurisdictions and a permit from the local building department. Natural gas eliminates propane tank swaps, but the line must be black iron or approved CSST (corrugated stainless steel tubing) per the International Fuel Gas Code. Shut-off valves should be within 6 feet of the appliance and clearly marked.
Electrical outlets for lighting, refrigerators, or rotisserie motors need GFCI protection when installed outdoors. Most codes require a 20-amp dedicated circuit for outdoor kitchen appliances, run through weatherproof conduit and metal-clad cable rated for exterior use. Hire a licensed electrician if you’re unfamiliar with the NEC (National Electrical Code) requirements, mistakes here create serious fire and shock hazards.
Storage integration separates a basic grill from a true outdoor kitchen. Include at least one weatherproof cabinet for propane (if not using natural gas), grilling tools, and cleaning supplies. Stainless steel doors resist rust and look sharp, but they’re pricey: marine-grade polymer cabinetry offers a cost-effective alternative with excellent UV and moisture resistance. Many homeowners tackling a complete outdoor makeover incorporate built-in stations as the centerpiece of the design.
Portable and Freestanding Grill Setups for Flexible Entertaining
Portable grill setups offer maximum flexibility without the cost or permanence of built-ins. A quality freestanding cart grill or standalone kettle can be repositioned for shade, wind protection, or party flow, and taken along if the homeowner moves. This option suits renters, anyone on a tight budget, or homeowners who want to test a layout before committing to masonry.
Propane cart grills are the most common portable choice. Look for models with locking casters rated for outdoor terrain, hard rubber or pneumatic wheels handle grass and gravel better than small plastic casters. Side shelves should fold down for storage, and BTU output should match cooking needs: 30,000–40,000 BTU handles most residential grilling, while larger six-burner units push 60,000+ BTU for serious searing or simultaneous zone cooking.
Charcoal kettles remain a favorite for traditional smoke flavor and high-heat capability. A standard 22-inch Weber-style kettle fits four to six burgers comfortably: bump up to a 26-inch model for larger crowds. Charcoal requires more hands-on fire management, plan for a 20–30 minute preheat and invest in a chimney starter to avoid lighter fluid taste. Ash cleanup is messier than gas, but the flavor payoff is significant for steaks, ribs, and anything that benefits from wood smoke.
For compact urban yards, small kamado-style ceramic grills or tabletop propane units deliver solid performance without taking over the patio. Kamados excel at heat retention and fuel efficiency, a single load of lump charcoal can maintain 225°F for 8+ hours during low-and-slow cooks, then crank up to 700°F for pizza. Tabletop propane grills work well on apartment balconies (check lease restrictions first) and typically run on 1-pound disposable canisters or adapt to a standard 20-pound tank with a hose kit.
Grill placement matters even for portables. Keep the unit at least 10 feet from the house, deck railings, and overhead structures to prevent siding damage and fire hazards. Grease drippings can stain concrete and pavers, use a grill mat or place the unit on a dedicated gravel pad that’s easy to rake clean. Propane tanks should always be stored upright in a ventilated area, never inside a garage or enclosed porch.
DIY Grill Island Projects on Any Budget
Building a custom grill island from scratch delivers a tailored outdoor kitchen at a fraction of professional installation costs. The project demands basic masonry or carpentry skills, but most DIYers can complete a simple island in a long weekend. Below are two approaches, one budget-conscious, one premium, that cover material choices, construction steps, and realistic cost ranges.
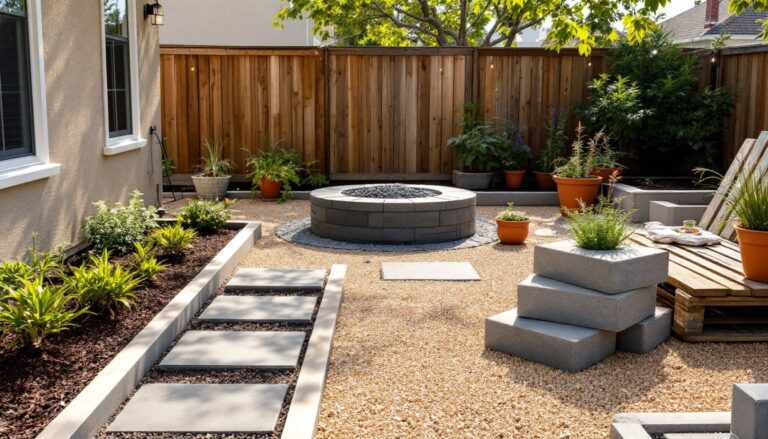
Budget-Friendly Cinder Block and Concrete Options
Cinder block (technically concrete masonry units, or CMUs) provides a fast, affordable structure for a DIY grill island. Standard 8×8×16-inch blocks cost around $2–$3 each: a typical island base uses 40–60 blocks depending on size and whether you include storage cubbies. Lay blocks in a running bond pattern with Type S mortar, which offers better adhesion and weather resistance than standard Type N.
Start with a level base: pour a 3–4 inch concrete slab or use compacted crushed stone topped with paver base if local frost depth is minimal. Dry-stack the first course to confirm layout, then mortar subsequent rows, checking level and plumb every two courses. Leave openings for propane tank access and utensil storage, 16-inch-wide gaps work well for standard tank sizes.
Once the block shell is up, finish the surface with stucco, tile, or stone veneer. Stucco is the cheapest finish: apply a scratch coat, brown coat, and color coat for a clean Mediterranean look at around $1–$2 per square foot in materials. Ceramic tile adds color and pattern for $3–$8 per square foot (plus thinset and grout), and it’s easier to clean than textured stucco. Porcelain is more frost-resistant than standard ceramic, critical in cold climates.
Countertop options on a budget include poured concrete (DIY-friendly with pre-mixed bags and melamine forms) or granite tile instead of slab. Concrete requires sealing every 1–2 years to resist stains and moisture, but it’s customizable with integral color or decorative aggregates. Granite tile runs $5–$15 per square foot and installs much like backsplash tile, though grout lines collect grime faster than a slab surface. Total material cost for a basic 6-foot cinder block island with concrete countertop typically lands between $400–$800, not including the grill itself.
Premium Stone and Brick Grill Surrounds
Natural stone and brick elevate a grill island into a high-end landscape feature that rivals professionally built outdoor kitchens. These materials cost more and demand tighter masonry tolerances, but the result is a structure that lasts decades with minimal maintenance. Homeowners exploring broader backyard upgrades often choose stone or brick to match existing hardscaping or patio materials.
Full-thickness stone (bluestone, granite, or limestone cut to 1.5–2 inches) creates a classic, durable island. Expect to pay $15–$35 per square foot for the stone itself, plus mortar, rebar, and concrete backer. Stone is heavy, each square foot of 2-inch bluestone weighs around 25 pounds, so the foundation must be robust. Pour a reinforced slab with #4 rebar on 12-inch centers, or use a thickened edge footing if the island is large.
Lay stone with Type S mortar in a running bond or ashlar pattern, maintaining consistent ½-inch joints. A wet saw with a diamond blade is essential for clean cuts: rent one if you don’t own it ($50–$80/day at most tool rental shops). Point the joints with matching mortar and tool them slightly recessed to shed water. Seal the finished stonework with a penetrating sealer to prevent efflorescence and staining from grease or acidic marinades.
Brick offers a timeless, textured look and slightly easier handling than stone. Standard modular bricks (3⅝×2¼×7⅝ inches) run $0.50–$1.50 each: a typical island uses 200–300 bricks. Choose SW-grade (severe weathering) bricks for outdoor use, they’re fired at higher temperatures and resist freeze-thaw damage better than standard building brick. Incorporate a drip edge or corbelled cap course to protect the island’s top from water infiltration.
Countertops for premium islands usually feature natural stone slabs (granite, soapstone, or quartzite) cut to size and finished with a bullnose or ogee edge. Granite slab costs $40–$100 per square foot installed, depending on color and thickness: soapstone is softer and easier to cut but requires periodic oiling. Both materials handle high heat near the grill and resist staining when properly sealed. Some DIYers skip the full slab and use 12×12-inch or 18×18-inch granite tiles with tight grout lines, cutting material costs by half while maintaining the upscale stone aesthetic.
Adding a stone or brick backsplash behind the grill protects nearby walls from heat and grease splatter. Inspiration for outdoor kitchen backsplashes can be found in creative tile and stone layouts that pair function with visual interest. Install backsplash material on a cement backer board, not directly against wood siding, and maintain at least 6 inches clearance from the grill’s cooking surface per manufacturer guidelines.
Creating Shade and Shelter Around Your Grill Area
Grilling in full sun or sudden rain cuts short cookouts and damages equipment. A well-planned shade structure extends usability, protects the cook, and keeps surfaces cooler. Options range from quick fabric canopies to permanent pergolas with integrated utilities.
Freestanding pop-up canopies (10×10 feet or 10×12 feet) offer instant shade for $100–$300. Look for powder-coated steel frames and UV-resistant polyester tops rated for at least 50+ UPF. Most pop-ups aren’t designed for permanent outdoor installation, wind, rain, and sun degrade the fabric within 1–2 seasons. Stake them securely with auger-style anchors or weight the legs with sandbags or concrete blocks (40+ pounds per leg for stability). These work best for occasional use or renters who can’t install permanent structures.
Pergolas provide lasting overhead coverage without fully blocking airflow or creating an enclosed space that traps smoke. A typical 10×12-foot pergola uses 4×4 posts, 2×6 rafters, and 2×2 cross slats spaced 12–16 inches apart for dappled shade. Pressure-treated lumber is the budget choice ($600–$1,000 in materials): cedar or redwood costs more but weathers to an attractive gray and resists rot naturally ($1,200–$2,000).
Posts should be set in concrete footings below the frost line, typically 36–48 inches deep depending on region. Use Sonotube forms to keep the hole clean and pour 3,000 PSI concrete around a galvanized post base or directly around the post if you prefer a traditional buried installation. Bolt the pergola frame together with ½-inch galvanized carriage bolts, not just nails or screws, for structural integrity.
Adding a retractable canopy or outdoor-rated shade cloth to the pergola extends rain protection and sun blocking. Waterproof canopies typically attach to the rafters with grommets and hooks: choose a fabric rated for outdoor mildew resistance and remove it during heavy snow to prevent tearing. Shade cloth (available in 30%, 50%, 70%, or 90% sun block) is lighter and more breathable, ideal for windy areas where solid fabric flaps noisily.
Pavilions or gazebos with solid roofs provide full weather protection and are worth considering if the grill will be used year-round. Metal or shingle roofing sheds rain and snow, but these structures often require building permits since they’re considered permanent. Check local zoning for setback requirements and height restrictions before purchasing a kit. Fire code may dictate minimum clearances between the grill and the roof, 36 inches is a common standard, though requirements vary. Homeowners considering advanced backyard projects should verify permit requirements early.
Ventilation is critical for any overhead structure near a grill. Even open pergolas should allow airflow on at least two sides to prevent smoke and heat buildup. Never enclose a grill area without proper exhaust ventilation, carbon monoxide from gas combustion or charcoal is odorless and deadly in confined spaces. If adding side walls or screens, leave gaps at the top and install a range hood or vent fan rated for outdoor use if code and budget allow.
Conclusion
A thoughtfully designed grill setup, whether portable, built-in, or DIY, expands usable living space and turns routine meals into outdoor events. Focus on solid foundations, proper clearances, and weather-appropriate materials to ensure the installation lasts. Permits, gas lines, and electrical work should involve licensed pros when required, but most layout and finishing work is well within reach for confident DIYers. With the right plan and materials, any backyard can support a functional, safe, and inviting cooking zone.