
A backyard shouldn’t just sit there. It’s usable square footage, outdoor living space that can function as a second kitchen, a reading nook, or a spot to host Friday night cookouts. Yet many homeowners leave their yards underutilized: a patch of grass, maybe a rusting grill, and not much else. The good news? Transforming a backyard doesn’t require a landscape architect or a five-figure budget. With a clear plan, the right materials, and a weekend or two, anyone can build functional zones that extend their home’s footprint and boost property value. Here’s how to tackle the most impactful outdoor upgrades.
Table of Contents
ToggleKey Takeaways
- Transform your backyard into functional outdoor living zones with a concrete paver pad, durable seating, and shade structures like pergolas to extend your home’s usable space without requiring a large budget.
- A stable surface, 10×12 feet minimum clearance, and weather protection are essential for a functional dining and entertainment zone, whether you’re installing a built-in grill island or setting up a simple table area.
- Water features ranging from container fountains to pondless waterfalls add ambiance and relaxation to outdoor backyard ideas, with simple options requiring only a submersible pump and outdoor outlet.
- Proper soil amendment with compost, quality edging, and 2–3 inches of mulch create healthy garden beds that frame your hardscape, while drip irrigation systems minimize water waste and disease.
- Layer outdoor lighting with pathway fixtures, uplighting, and string lights to extend evening enjoyment safely, using warm white LED fixtures and proper support to avoid an over-lit appearance.
- Fire pits and outdoor fireplaces serve as year-round focal points for gathering, but require checking local fire codes and maintaining proper clearance distances from structures and overhanging branches.
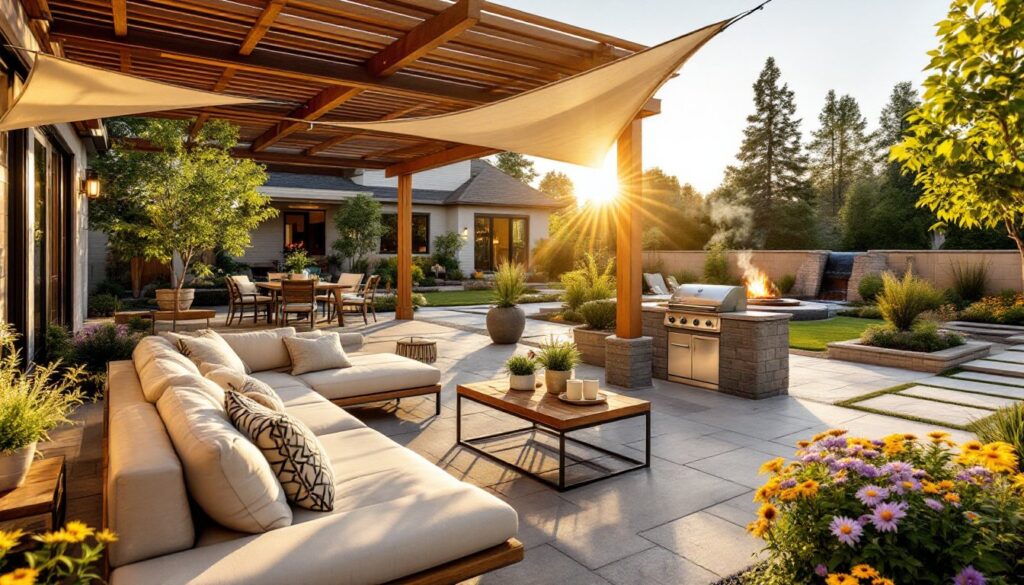
Create a Cozy Outdoor Living Room
An outdoor living room gives a backyard a purpose beyond mowing. The goal is to replicate indoor comfort, seating, shade, and weather resistance, so the space gets used more than twice a summer.
Start with a defined floor surface. Grass won’t cut it for furniture: it compacts, holds moisture, and makes chairs wobble. Consider a 12×12-foot concrete paver pad (around 144 square feet, a common starter size) or composite deck tiles that snap together over existing concrete. Pavers should sit on 4–6 inches of compacted gravel base to prevent shifting. If pouring a concrete slab, include a 2% slope away from the house for drainage and let it cure for at least seven days before adding furniture.
For seating, outdoor-rated materials matter. Aluminum frames with solution-dyed acrylic cushions resist UV fade and dry quickly after rain. Avoid untreated wood or indoor upholstery, it’ll rot or mildew within a season. A sectional sofa, two club chairs, and a coffee table typically require about 100 square feet of floor space, so plan dimensions before building the pad.
Shade is non-negotiable in most climates. A 10×10-foot pergola with pressure-treated 4×4 posts and 2×6 rafters provides partial shade and supports climbing vines or a retractable canopy. Anchor posts in concrete footings at least 12 inches in diameter and 24 inches deep (or below frost line). If a pergola feels too permanent, a cantilever umbrella with a weighted base (minimum 75 pounds) offers flexibility. Beginners often find the best backyard makeovers start with establishing comfortable seating zones before adding other features.
Safety note: Wear work gloves and safety glasses when cutting lumber or mixing concrete. Use a power auger for digging post holes in hard soil, a manual post-hole digger works but takes significantly longer and strains the back.
Design a Functional Dining and Entertainment Zone
A backyard dining area needs more than a picnic table and a hope for good weather. It requires a stable surface, adequate clearance, and protection from the elements.
Plan for at least 10 feet by 12 feet if using a standard 6-foot rectangular table with six chairs. Add another 3 feet of clearance around the table so chairs can pull out without hitting walls or planters. A concrete patio or mortared flagstone works better than loose gravel, which shifts under table legs and makes dishes wobble.
For cooking, a built-in grill island with a concrete block base and tile or stone veneer offers durability and storage. A basic L-shaped island (around 6 feet by 4 feet) can house a drop-in propane grill, a side burner, and a small refrigerator. Run a dedicated 20-amp GFCI-protected circuit for the fridge and any outlets, this is NEC-required for outdoor receptacles and typically needs a permit. If electrical work isn’t in the skillset, hire a licensed electrician. Mistakes with outdoor wiring lead to shorts, shocks, or fires.
A shade sail or solid roof overhang keeps rain off the table and prevents sun glare during meals. Shade sails (triangular or square fabric panels) attach to eye bolts anchored into posts or fascia boards. Use stainless steel hardware rated for outdoor use, galvanized steel rusts out in a few seasons. Tension the sail taut to prevent sagging and water pooling. For a permanent solution, extend the home’s roofline with a hip or gable roof addition, but this often requires a building permit and engineered plans, especially if attaching to the house structure.
Incorporating a practical makeover approach helps first-timers prioritize function over form and avoid over-complicating the layout.
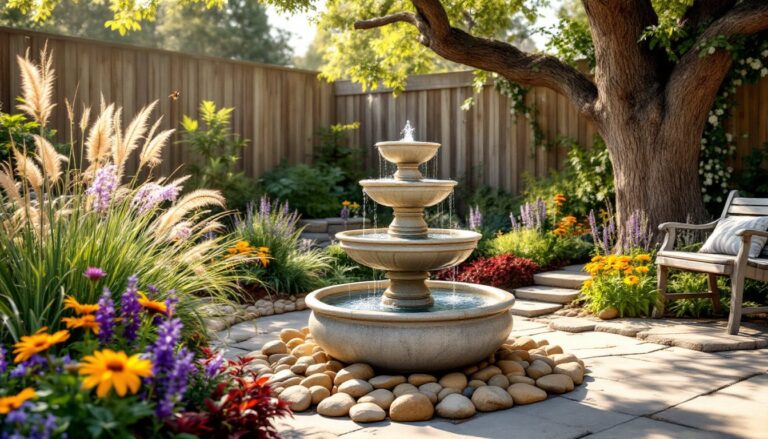
Add Water Features for Ambiance and Relaxation
Water features range from a 50-gallon ceramic fountain to a full in-ground pond with a recirculating pump. The right choice depends on budget, maintenance tolerance, and yard size.
A container fountain (urn, bowl, or tiered basin) is the easiest entry point. These run on a small submersible pump (50–200 GPH) and plug into a standard outdoor outlet. Place the fountain on a level concrete pad or paver base, sitting it on soil causes tipping as the ground settles. Refill every few days in hot weather: evaporation is constant. Add a fountain pump protector (a mesh bag) to keep debris out of the impeller.
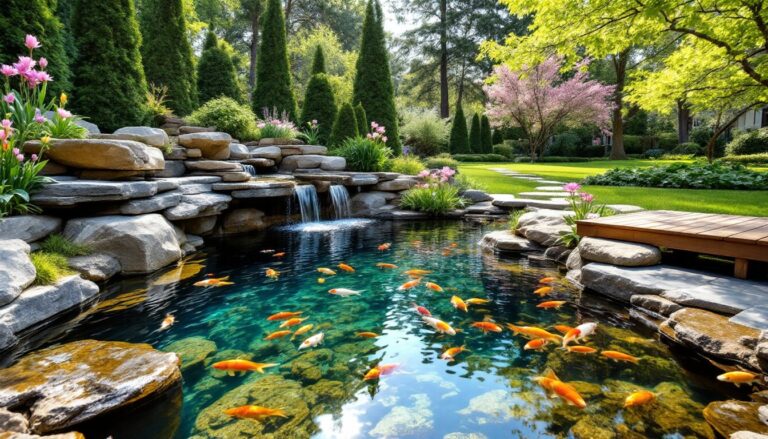
For a pondless waterfall, dig a reservoir pit (about 2 feet deep and 3 feet wide), line it with 45-mil EPDM rubber pond liner, and fill it with river rock. A waterfall spillway or stacked flagstone creates the cascade, with a 1,200–2,000 GPH pump recirculating water from the hidden reservoir. This setup eliminates standing water (and mosquitoes) while keeping the sound and motion. Expect to spend a weekend on installation and around $500–$1,200 in materials, depending on pump quality and stone selection.
A true pond with fish requires at least 100 gallons, a biofilter, and regular maintenance (testing pH, removing algae, feeding koi). Liner installation is similar to a pondless feature, but deeper, 18–24 inches minimum for fish to survive winter in most climates. Check local codes: some municipalities regulate water features over a certain depth due to safety concerns.
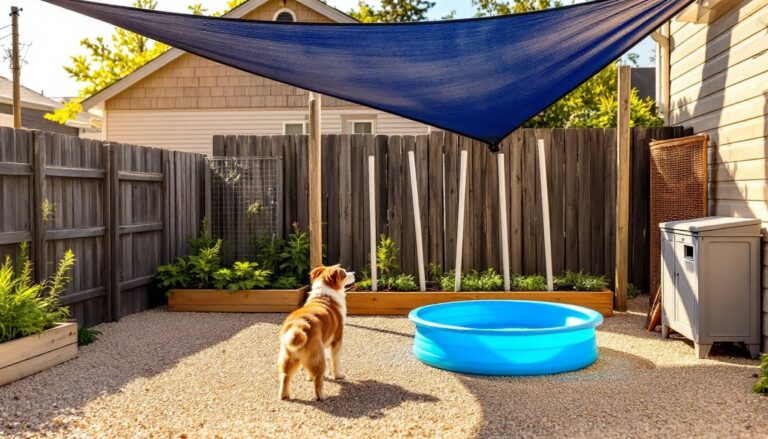
Safety: Use only GFCI-protected outdoor outlets for pumps. Water and electricity are a dangerous combination. Consider routing power through a low-voltage transformer if the feature is near a play area. Drawing design ideas from curated inspiration sources can spark creative approaches while staying within a realistic scope.
Incorporate Greenery and Garden Beds
Planting beds frame hardscape, soften edges, and add seasonal color. But soil prep and plant selection make or break the results.
Start by defining bed edges with steel, aluminum, or composite landscape edging. Plastic edging looks cheap and frost-heaves out of the ground every winter. Dig a 4–6 inch deep trench, set the edging, and backfill. This keeps mulch in place and grass runners out.
Soil matters more than the plants. Most yards have compacted clay or sandy fill that won’t support healthy root growth. Amend beds with 2–3 inches of compost tilled into the top 6–8 inches of native soil. For raised beds, build frames from 2×8 or 2×10 pressure-treated or cedar boards and fill with a 50/50 mix of topsoil and compost. A 4×8-foot raised bed holds about 21 cubic feet of soil (roughly three-quarters of a cubic yard).
Choose plants suited to the site’s sun exposure and USDA hardiness zone. A shade bed under a tree won’t support sun-loving roses, and tropical plants won’t survive a Zone 5 winter. Native perennials (coneflower, black-eyed Susan, ornamental grasses) require less water and resist local pests better than non-native annuals.
Mulch beds with 2–3 inches of shredded hardwood or pine bark. Mulch suppresses weeds, retains moisture, and regulates soil temperature. Avoid piling mulch against plant stems or tree trunks, “mulch volcanoes” cause rot and invite insects. Gardening advice from resources like The Spruce provides plant-specific care details and troubleshooting.
Drip irrigation beats hand-watering for efficiency. A soaker hose or 1/2-inch drip line with emitters every 12 inches delivers water directly to roots, reducing waste and disease. Run the system on a timer during early morning hours to minimize evaporation.
Install Outdoor Lighting for Evening Enjoyment
Lighting extends usability after sunset and improves safety on paths and stairs. But overlighting turns a backyard into a stadium: aim for layers and subtlety.
Start with pathway lighting. Low-voltage LED fixtures (12V) run off a transformer plugged into a GFCI outlet. Space fixtures 6–8 feet apart along walks and driveways. Bury the wire 6 inches deep in a shallow trench and use direct-burial-rated cable. A 150-watt transformer powers about ten 10-watt fixtures: calculate total wattage before buying.
Uplighting highlights trees, architectural features, or garden focal points. Place a 3–5 watt LED spotlight at the base of a tree trunk, angled upward. For a pergola or deck, install recessed can lights or surface-mount downlights on beams to create ambient wash without glare. Use warm white (2700K–3000K) LEDs, cooler color temps feel harsh and commercial.
String lights add charm but need proper support. Hang them from a cable or wire tensioned between posts, not draped loosely (which sags and looks sloppy). Use outdoor-rated string lights with sealed sockets to prevent moisture intrusion. Solar options exist but often deliver dim, inconsistent light: plug-in LEDs are brighter and more reliable.
For decks and patios, step lights or rail-mounted fixtures prevent trips and define edges. Mount them low and recessed so they illuminate the tread without shining in anyone’s eyes. Many of the latest design trends incorporate integrated lighting into built features like benches and planters.
Safety: Always use fixtures rated for wet or damp locations (check the UL listing). Hire an electrician for any 120V line-voltage work, DIY is fine for low-voltage, but mains wiring outdoors carries serious risk if done incorrectly.
Build a Fire Pit or Outdoor Fireplace
A fire feature turns a backyard into a year-round gathering spot. The choice between a fire pit and a fireplace depends on budget, space, and local regulations.
A portable steel or cast-iron fire pit is the simplest option, no construction required. Place it on a non-flammable surface (concrete, pavers, or gravel) at least 10 feet from structures and overhanging branches. Many municipalities have setback requirements: check local fire codes before lighting up. Use seasoned hardwood (oak, maple) for cleaner, longer burns: softwoods like pine create excess smoke and spark.
For a permanent in-ground fire pit, excavate a 36–48 inch diameter circle, 12 inches deep. Line the pit with fire brick or a steel ring insert, then surround it with stacked stone or concrete retaining wall blocks. Cap the wall with flagstone or cut bluestone for a finished seating edge. Don’t use river rock or limestone inside the fire ring, they can crack or explode when heated. Add 3–4 inches of pea gravel in the base for drainage.
A fire pit with a natural gas or propane burner eliminates wood smoke and ash cleanup. Run a black iron gas line from the house or use a propane tank hidden in a side compartment. Gas work requires a permit in most jurisdictions and should be done by a licensed plumber or HVAC tech unless the homeowner has experience with pipe threading and pressure testing.
An outdoor fireplace (masonry or prefab metal) adds vertical drama and focuses heat in one direction. A prefab steel unit costs $2,000–$4,000 installed: a custom brick or stone fireplace can run $5,000–$10,000+ depending on size and finish. Both often require a concrete footing and may trigger zoning reviews if they exceed certain heights. Exploring comprehensive guides or detailed makeover ideas helps clarify which features offer the most value per dollar invested.
Safety: Keep a fire extinguisher or garden hose nearby. Never leave a fire unattended, and fully extinguish embers before going inside. Wear heat-resistant gloves when moving grates or adding wood. Rustic project inspiration from Country Living often includes traditional fire pit designs suited to farmhouse or cottage-style yards.
Conclusion
A functional backyard doesn’t happen by accident. It requires planning dimensions, choosing durable materials, and doing the prep work most people skip. But the payoff, extra living space, higher property value, and a place people actually want to spend time, makes it worth the effort. Start with one zone, build it right, and expand from there.